Replacing the Release Cable on a Lincoln Infinity Series Trap
When working on or around trap machines, always wear eye protection and proceed with extreme caution. Trap machines have pinch points and components that move rapidly. Safety information included in your owner’s manual must be read and understood before performing work on any trap machine.

The release cable on a Lincoln Infinity Series Trap connects a wired or wireless release system to the circuit board of the trap. There are a few different reasons to replace this cable, the twist lock plug can become corroded and non-functional, the cable can be damaged, or on some machines, the Molex connector inside the control box may be faulty.
Step 1:
Release the machine and disconnect one of the battery leads to ensure the machine is safe before beginning work.
Step 2:
Locate the control box; on sporting and skeet machines, the control box can be found hanging from the magazine plate at the rear of the trap. On wobble or oscillating traps, the control box is found secured to the base at the front of the trap or remotely located on a wall nearby. Remove the four screws that secure the control box lid and remove the cover. Note that a gasket should be seated into a channel in the control box lid. If this gasket is damaged or missing, replace the gasket.
Step 3:
Locate and remove the strain relief clamp from the release cable.
On skeet and sporting machines, the strain relief is on the back side of the control box.
On wobble and oscillating machines, the strain relief is located on the red base of the machine.
Step 4:
Locate the release cable connection on the circuit board and the cable gland in the control box housing.
On skeet and sporting machines, the release cable connects to the board via a Molex connector shown below circled in red. This connector has a small locking tab on the bottom that must be depressed before the connector can be pulled from the board, a small flathead screwdriver works well for releasing the locking tab.
On wobble and oscillating trap machines, the release cable connects to the board via a terminal block that is circled in red below. The three screws labeled 1, 2, and 3 must be loosened then the release cable wires can be removed from the terminal block.
Step 5:
The red arrow points to the cable gland, the nut must be threaded off of the gland from the inside of the box and then the cable and cable gland can be removed from the control box.
Step 6:
Feed the new release cable into the box and secure the cable gland with the nut.
On skeet and sporting machines, simply push the Molex connector back onto the circuit board.
On Wobble and Oscillating traps, each of the release cable wires is labeled 1, 2, or 3. Fit each wire into the corresponding position in the terminal block and tighten the flat head screw to secure it. Make sure that all of the strands in each wire are contained in the terminal block. Loose strands of wire can cause a short.
Step 7:
Resecure the release cable strain relief clamp.
Step 8:
Put the lid back on the control box, ensuring the seal is properly seated into the channel in the lid. Secure the lid with the four screws, do not overtighten.
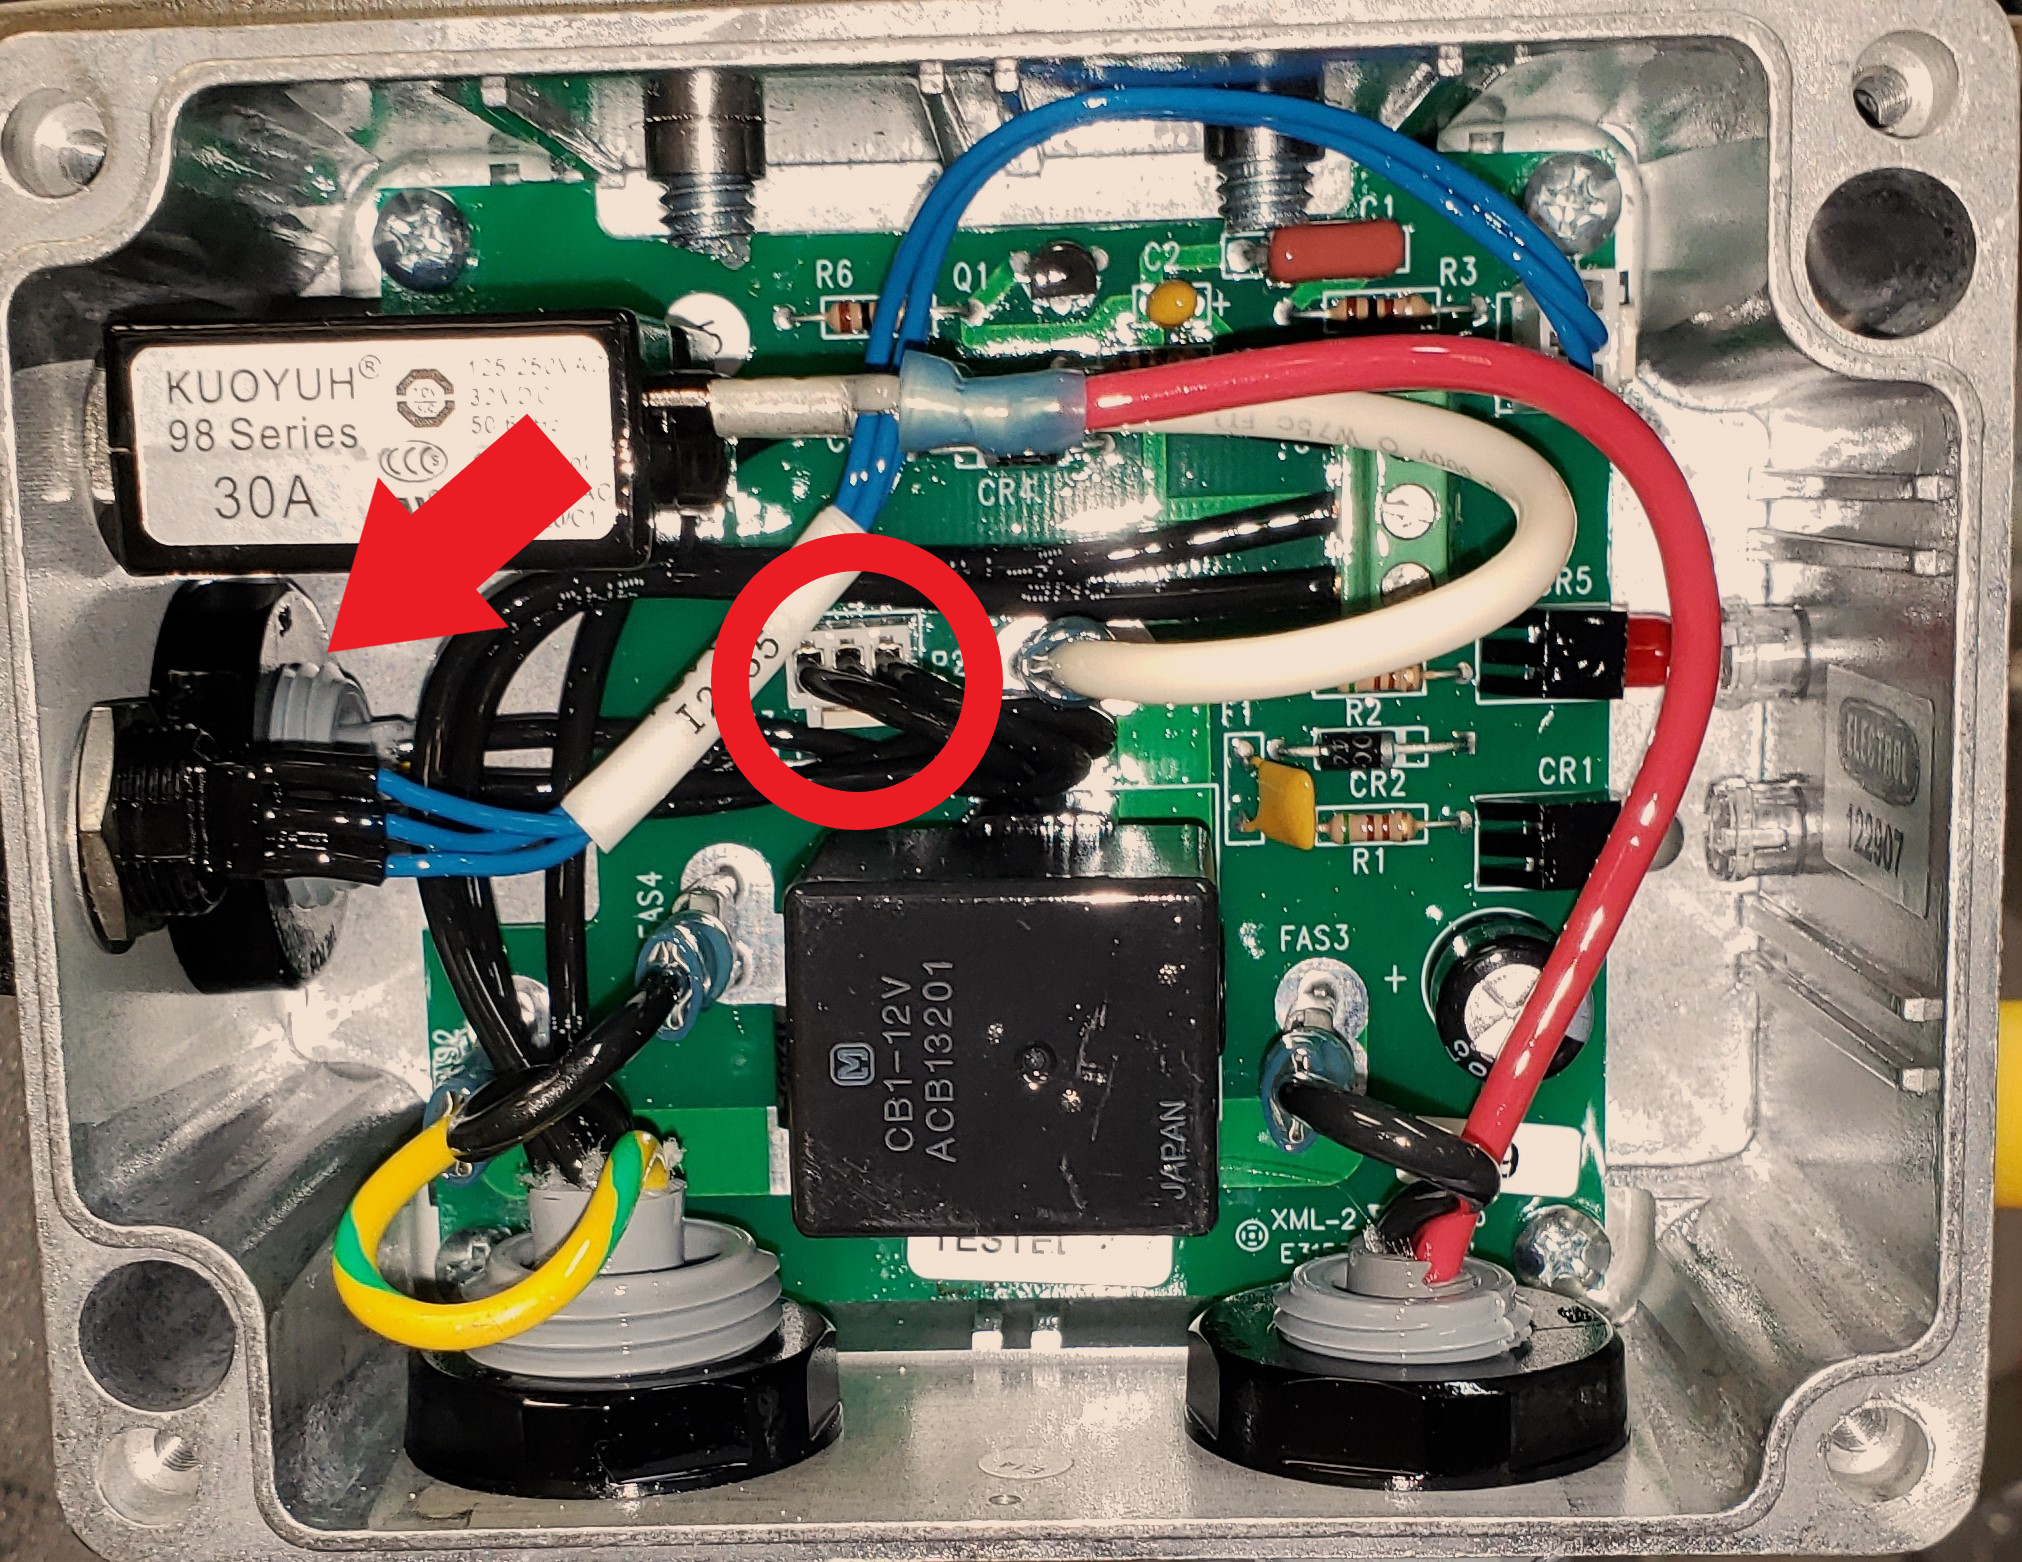
Skeet and Sporting trap control box interior

Wobble and Oscillating trap control box interior